Building a Voice Controlled Flappy Bird
Flappy Bird is a very simple game, one where a user would tap their cell phone screen, to make a bird “flap”, and avoid pipes. It was an unexpectedly successful game, going viral after having been picked up by the YouTube gaming commnunity as an especially frustrating game to play.
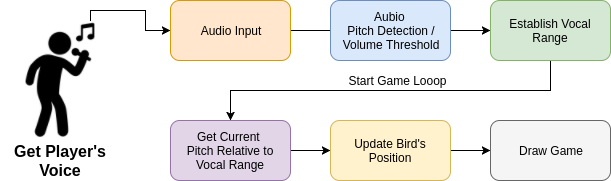
In today’s post, we’ll remake Flappy Bird, but this time, we’ll use pitch detection and vocal range to make it a voice controlled singing game. Our bird will fly at the level of the current note we sing.
Because we’ll be dealing with musical notes, this post will walk through an introduction into music theory, and then jump into some basic tools for building a musical game.
If you’ve ever played anything like Rocksmith or Rock Band, we’ll be using the same sort of pitch detection and note correlation to give our player feedback that they’ve hit the right notes.
A (Short) Background of Music Theory

Before we dive in to the code, we should probably first talk about human perception of sound, and how music works in the West (in 2017).
In general, we start from a completely arbitrary center for most of Western music.
Collectively, we’ve decided that A4 is equal to 440Hz. This means that all the other places for notes are relative to this. With A4 at 440Hz, we then create all the other notes around it.
From here, we have what are called “Octaves”. Each time we double or half this frequency (880Hz, 220Hz), we get the same note A, but either one octave higher, or one octave lower. As we go down, we subtract from the second number, so 220Hz is A3, and when we go up an octave, we add to the number. (880Hz is A5).
Press to hear the note A in 8 different octaves
Each octave is then broken down into twelve parts. Each of these twelve parts are supposed to be equal distance from the next, ending on the octave. We call these “half-steps”.
The half-steps each end on an individual note. The progression of half-steps looks like this:
Each of the 12 half steps in an octave
from C4 to B4
The whole thing loops around all over again, at the next octave.
You’ll notice some of these notes have # at then end of them. These represent “sharps”, or in between notes. Most notes have in between notes, with the exception of B and C, and E and F. These notes are unique, as they are both a half step away from one another.
We start our scale on C, and not A. Why is that? It turns out, music has been a multi-century invention, and musical notes were invented the half note scale we're talking about. So we went back and put our new scale on the already existing musical notation.
You can see a great video explaining the reasons for this confusing setup here.
As we get into the higher octaves, the distances between notes in Hertz gets bigger and bigger. For example the distance between A1 and A2 is only 55 Hertz, but the distance between A5 and A6 is 880 Hertz! If we’re going to look at distances between notes, we’ll need to adapt to the octave we’re in to measure distances.
So, what does music theory have to say about all the “gaps” between the actual notes? How do we manage them, and how do we label the “in-between” notes from imperfect singers?
Introducing the Cent, Or A Hundredth of a Half-Step

“Cents” are a unit of measuring in between half steps. Using cents, we can tell how far away a note if from the “perfect pitch”, or ideal sound for our note.
A cent is one-one hundredth of a half step. So, using cents, we can tell how far we are from our ideal note, regardless of what octave we’re working at. Each cent should evenly spaced, regardless of our octave, because each individual half-step is different, depending on our octave.
A proper implementation of cents should allow us to measure how close or far away our singer is from the proper pitch, regardless of the octave they’re singing in.
Converting Between Pitch and Musical Notes
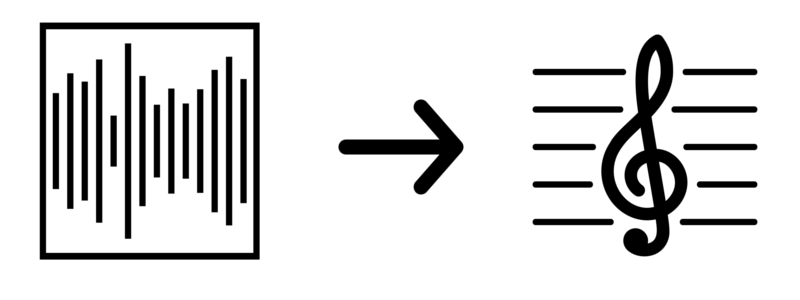
aubio, the pitch detection framework we introduced in the Video Synthesizer post, has a pitch detection method. This method returns the dominant pitch frequency detected by an audio input.
Using this pitch returned in Hertz, we can then use a musical framework (in this case, Music21), to convert our frequency into a musical note.
With this musical note, we can then measure how far away our frequency is from the ideal pitch in cents. We can set up a threshold for staying in key for our software, and provide visual feedback when our player isn’t singing the proper note.
The code to convert from a frequency to a note in Music21 looks like this:
import music21

a4 = music21.pitch.Pitch() # create a Pitch object
a4.frequency = 440 # set the pitch in Hertz

print(a4.nameWithOctave) # prints 'A4'
As a bonus, when our frequency is off by a bit, we can get this directly from our new Pitch object in cents like this:
bad_note = music21.pitch.Pitch()
bad_note.frequency = 488
print(bad_note.microtone.cents) # prints -20.74, number of cents from closest note
print(bad_note.nameWithOctave)  # in this case, B4 is closest note
Discovering a User’s Vocal Range
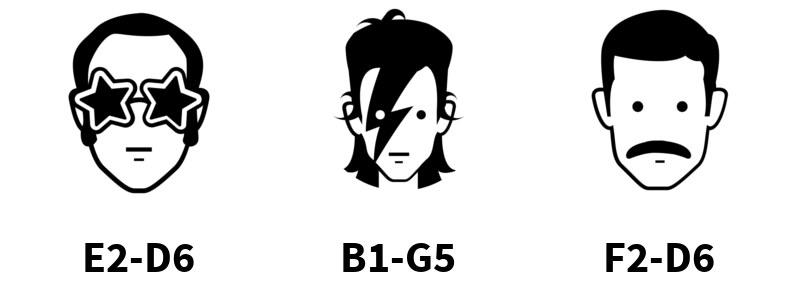
Each person has what’s called their own “vocal range”. A person’s vocal range can be between three to at most currently, ten octaves.
In order to have our player able to sing comfortably, we’ll need to detect their vocal range, and allow them to work within their own framework of what is possible for a low note, all the way up to a high note.
To do this, we’ll need to have them sing the lowest note possible, while checking for a specific cent deviation, so we know that they can truly hold that note that they’re trying to sing.
After we’ve detected the lowest note, we can then grab the highest note they can sing, again using the criteria of a set amount of cent deviation we’ll allow.
Setting the Spaces on a Vocal Range
If we want to make our video game musical, it’ll need to follow some sort of musical structure. The most basic way we can do that is by using what’s called a scale.
In our case, we’ll use the most basic scale there is, the C major scale. I say it’s easy, because it’s just exactly all the notes without any “#”s in our set of notes.
So we can then set our pipe spaces to be in the places where the major notes would all fall. And through this we’ll have the basic start of a musical sound.
Music works via a set of intervals, or distances from the base note it’s in. We can use this to create automatic music for our game.
Where to Begin on Larger Programs

So, with all this theory in place, how do you even begin?
With bigger, more complicated programs like this, the best thing to do is start from the smallest possible thing.
Forget all the other problems, and start with the one thing that you’ll need first, before you can jump into the others.
In my case, it’s figuring out a person’s vocal range. So, let’s do that first. We’ll need to take in a person’s voice from the microphone, and then we’ll need them to sing a low note, hold it, and then a high note, and hold it. With this, we’ll want two notes out, so that we can send them into our game, where our users will try and sing in even notes between the two.
Once we’ve got that, we’ll then want a way to tell where a note is on a person’s vocal range. We can then map the places on the screen to the notes a person is capable of singing. With this, we should have all we need to turn their voice into a controller.
Writing the Vocal Range Detector

Since the vocal range detector is the first thing we’ll need, we should begin with it.
We’ll want to open up the microphone, and then use this to pass into aubio’s pitch detection routine. Once we’ve got that pitch in Hertz, we’ll then use Music21’s note function to convert it into a pitch.
Music21’s pitch object then automatically sets the pitch’s name to be the closest note, with it’s nameWithOctave variable. If the pitch isn’t perfect, it’ll also have a set microtone.cents, with the amount of cents deviation from the perfect pitch.
We can use the microtone cents in order to detect if our singer isn’t quite hitting the proper note, and determine if we should let them use this note in their vocal range.
We’ll also need to set a duration for how long they should hold their note. This can make using the program very difficult, so choose wisely. In my case, I ended up with a note_hold of 20 samples in a row of being in the same key with a cent range set fairly loose.
Here’s what the code looks like:
import aubio
import numpy as np
import pyaudio

import time
import argparse

import music21 # yes!

parser = argparse.ArgumentParser()
parser.add_argument("-input", required=False, type=int, help="Audio Input Device")
args = parser.parse_args()

if not args.input:
    print("No input device specified. Printing list of input devices now: ")
    p = pyaudio.PyAudio()
    for i in range(p.get_device_count()):
        print("Device number (%i): %s" % (i, p.get_device_info_by_index(i).get('name')))
    print("Run this program with -input 1, or the number of the input you'd like to use.")
    exit()

# PyAudio object.
p = pyaudio.PyAudio()

# Open stream.
stream = p.open(format=pyaudio.paFloat32,
                channels=1, rate=44100, input=True,
                input_device_index=args.input, frames_per_buffer=4096)
time.sleep(1)
# Aubio's pitch detection.
pDetection = aubio.pitch("default", 2048,
    2048//2, 44100)
# Set unit.
pDetection.set_unit("Hz")
pDetection.set_silence(-40)

def get_vocal_range(volume_thresh=0.01, cent_range=20, note_hold=20):

    note_curr = 0 # counter for how many consistent samples while recording
    range_low = "" # name of note we achieved at lowest range
    range_high = "" # name of note achieved at highest


    have_range = False

    previous_note = ""
    current_pitch = music21.pitch.Pitch()

    while not have_range:

        data = stream.read(1024, exception_on_overflow=False)
        samples = np.fromstring(data,
                                dtype=aubio.float_type)
        pitch = pDetection(samples)[0]

        # Compute the energy (volume) of the
        # current frame.
        volume = np.sum(samples**2)/len(samples) * 100

        # You can uncomment the volume below to make sure the threshold matches
        # your microphone's threshold
        #print(volume)

        if pitch and volume > volume_thresh: # adjust with your mic! .0002 if for my telecaster, .001 for my mic
            current_pitch.frequency = pitch
        else:
            continue

        if current_pitch.microtone.cents > cent_range:
            print("Note %s outside of Cent Range with %i" %
                  (current_pitch.nameWithOctave, current_pitch.microtone.cents))
            previous_note = ""
            continue

        current = current_pitch.nameWithOctave


        if current == previous_note:
            note_curr += 1
            if note_curr == note_hold:
                if range_low != "" and range_low != current:
                    range_high = current
                    have_range = True
                    print("got range of high")
                else:
                    range_low = current
                    print("got range of low")
        else:
            note_curr = 0
            note = current
            previous_note = current
            print(current)

    return range_low, range_high

min_note, max_note = get_vocal_range()
print("total range: %s to %s" % (min_note, max_note))
In the above code, there’s one more thing I haven’t mentioned yet, the volume threshold of your microphone.
In my case, my microphone has audio coming in at around the volume level of .001. You may need to adjust this to fit your microphone, by uncommenting out the print(volume) line, and watching for the change when you begin singing into your microphone.
What we’re looking for here is for the volume threshold to be high enough that pitch detection is only tried when we’re actually singing, and not when our microphone pics up background noise.
Calculating the Current Note’s Position on Our Vocal Range

Now, there are a few different ways we can calculate our user’s position on the vocal range.
For one, we could map the entire vocal range to our screen, directly. If our user sings a note, we take that note, and calculate the distance from the lowest note they can sing. We should then have a distance in cents.
Using this distance in cents, we can then divide it by the total interval in cents from the lowest to the highest note the person can sing. We’ll then have a number from zero to one, with each note representing a decimal in between.
We can then directly map this number to the screen by multiplying by our screen’s height resolution. Each note would then directly map to our screen.
But there’s a trade off here, because this number doesn’t really mean anything musically. It just represents a space, and in order to make it musical, we’ll have to have our hazards represent the places on the screen of the specific notes we want our user to sing.
For now, let’s use the current note’s position as a number from zero to one:
# code continues from above

def position_on_range(low_note, high_note, volume_thresh=.0001, cent_range=5):
    lowNote = music21.note.Note(low_note)
    highNote = music21.note.Note(high_note)

    vocalInterval = music21.interval.notesToInterval(lowNote, highNote)

    current_pitch = music21.pitch.Pitch()

    while True:

        data = stream.read(1024, exception_on_overflow=False)
        samples = np.fromstring(data,
                                dtype=aubio.float_type)
        pitch = pDetection(samples)[0]

        # Compute the energy (volume) of the
        # current frame.
        volume = np.sum(samples**2)/len(samples)

        if pitch and volume > volume_thresh: # adjust with your mic! .0002 if for my telecaster, .001 for my mic
            current_pitch.frequency = pitch
        else:
            continue

        if current_pitch.microtone.cents > cent_range:
            #print("Outside of Cent Range with %i" % current_pitch.microtone.cents)
            previous_note = ""
            continue

        current = current_pitch.nameWithOctave

        cur_interval = music21.interval.notesToInterval(lowNote, current_pitch)
        print(cur_interval.cents / vocalInterval.cents)

position_on_range(min_note, max_note)
The code to calculate the current pitch’s place is mostly the same as detecting our initial vocal range. The only thing new we’ve added is calculating the intervals using music21’s notesToInterval. This gives us back an interval, and one of the units we can use here to measure is cents.
We don’t actually put this number anywhere, and instead we print it out to the screen. Later, we’ll put this number on a Queue, so that our voice detection can run on it’s own thread, and our game can pop all the sung notes into places on the screen for our bird to be.
Separating Our Audio and Game Code
If our audio code is going to be running on it’s own thread, we should really separate it out from our game code. We can do this easy enough, by creating a Queue object in the audio file, and then importing the Queue into our main game loop.
From here, we can also add the following code, to make it so our functions don’t get run automatically when we’re importing our get_vocal_range and position_on_range functions.
This can go at the end of our program, and turns our prototype program into a reusable library for when we want to work with a user’s voice as input:
if __name__ == '__main__':
    low_note, high_note = get_vocal_range()
    position_on_range()
Finally, I import Queue, and create a Queue called q in the program. I then make sure to q.put our vocal range intervals instead of printing them.
We can then import the q from our main program, and get each of the values as they come in on their own thread.
Writing the Game Code

Since this post is mostly concerned with explaining how to get voice into our program as a type of input, the I won’t focus on the specifics of the game code as much.
I started from the great FlapPyBird clone, and took the image assets.
From here, I then replaced the “flap” function calls with the loop checking if there’s anything on the queue. If there is, we then put the bird in the position on the screen that matches the current position in the vocal range.
I haven’t yet added a handler for when the player hits a pipe, or made it so the pipes make musical sense. For now, they just spawn randomly.
from voiceController import get_vocal_range, position_on_range, q, stream

from threading import Thread

import pygame
import random
from itertools import cycle

PIPEGAPSIZE = 100
screenWidth, screenHeight = 288, 512
screen = pygame.display.set_mode((screenWidth, screenHeight))

clock = pygame.time.Clock()

bird = ('images/redbird-downflap.png',
        'images/redbird-midflap.png',
        'images/redbird-upflap.png')

background = 'images/background-day.png'
pipe = 'images/pipe-green.png'

IMAGES = {}
HITMASKS = {}
IMAGES['background'] = pygame.image.load(background).convert()
IMAGES['player'] = (
    pygame.image.load(bird[0]).convert_alpha(),
    pygame.image.load(bird[1]).convert_alpha(),
    pygame.image.load(bird[2]).convert_alpha(),
)

IMAGES['pipe'] = (
    pygame.transform.flip(
        pygame.image.load(pipe).convert_alpha(), False, True),
    pygame.image.load(pipe)
)

IMAGES['base'] = pygame.image.load('images/base.png').convert_alpha()
BASEY = screenHeight * 0.89

def checkCrash(player, upperPipes, lowerPipes):
    """returns True if player collders with base or pipes."""
    pi = player['index']
    player['w'] = IMAGES['player'][0].get_width()
    player['h'] = IMAGES['player'][0].get_height()

    # if player crashes into ground
    if player['y'] + player['h'] >= BASEY - 1:
        return [True, True]
    else:

        playerRect = pygame.Rect(player['x'], player['y'],
                      player['w'], player['h'])
        pipeW = IMAGES['pipe'][0].get_width()
        pipeH = IMAGES['pipe'][0].get_height()

        for uPipe, lPipe in zip(upperPipes, lowerPipes):
            # upper and lower pipe rects
            uPipeRect = pygame.Rect(uPipe['x'], uPipe['y'], pipeW, pipeH)
            lPipeRect = pygame.Rect(lPipe['x'], lPipe['y'], pipeW, pipeH)

            # player and upper/lower pipe hitmasks
            pHitMask = HITMASKS['player'][pi]
            uHitmask = HITMASKS['pipe'][0]
            lHitmask = HITMASKS['pipe'][1]

            # if bird collided with upipe or lpipe
            uCollide = pixelCollision(playerRect, uPipeRect, pHitMask, uHitmask)
            lCollide = pixelCollision(playerRect, lPipeRect, pHitMask, lHitmask)

            if uCollide or lCollide:
                return [True, False]

    return [False, False]

def pixelCollision(rect1, rect2, hitmask1, hitmask2):
    """Checks if two objects collide and not just their rects"""
    rect = rect1.clip(rect2)

    if rect.width == 0 or rect.height == 0:
        return False

    x1, y1 = rect.x - rect1.x, rect.y - rect1.y
    x2, y2 = rect.x - rect2.x, rect.y - rect2.y

    for x in range(rect.width):
        for y in range(rect.height):
            if hitmask1[x1+x][y1+y] and hitmask2[x2+x][y2+y]:
                return True
    return False

def getHitmask(image):
    """returns a hitmask using an image's alpha."""
    mask = []
    for x in range(image.get_width()):
        mask.append([])
        for y in range(image.get_height()):
            mask[x].append(bool(image.get_at((x,y))[3]))
    return mask

def getRandomPipe():
    """returns a randomly generated pipe"""
    # y of gap between upper and lower pipe
    gapY = random.randrange(0, int(BASEY * 0.6 - PIPEGAPSIZE))
    gapY += int(BASEY * 0.2)
    pipeHeight = IMAGES['pipe'][0].get_height()
    pipeX = screenWidth + 10

    return [
        {'x': pipeX, 'y': gapY - pipeHeight},  # upper pipe
        {'x': pipeX, 'y': gapY + PIPEGAPSIZE}, # lower pipe
    ]

# hismask for pipes
HITMASKS['pipe'] = (
    getHitmask(IMAGES['pipe'][0]),
    getHitmask(IMAGES['pipe'][1]),
)

# hitmask for player
HITMASKS['player'] = (
    getHitmask(IMAGES['player'][0]),
    getHitmask(IMAGES['player'][1]),
    getHitmask(IMAGES['player'][2]),
)

def draw_pygame():
    running = True
    playerIndex = 0
    playerIndexGen = cycle([0, 1, 2, 1])
    # iterator used to change playerIndex after every 5th iteration
    loopIter = 0

    basex = 0
    # amount by which base can maximum shift to left
    baseShift = IMAGES['base'].get_width() - IMAGES['background'].get_width()

    playerX = int(screenWidth * .2)
    playerY = screenHeight // 2

    basex = 0
    baseShift = IMAGES['base'].get_width() - IMAGES['background'].get_width()

    # get 2 new pipes to add to upperPipes lowerPipes list
    newPipe1 = getRandomPipe()
    newPipe2 = getRandomPipe()

    # list of upper pipes
    upperPipes = [
        {'x': screenWidth + 200, 'y': newPipe1[0]['y']},
        {'x': screenWidth + 200 + (screenWidth / 2), 'y': newPipe2[0]['y']},
    ]

    # list of lowerpipe
    lowerPipes = [
        {'x': screenWidth + 200, 'y': newPipe1[1]['y']},
        {'x': screenWidth + 200 + (screenWidth / 2), 'y': newPipe2[1]['y']},
    ]

    pipeVelX = -2


    while running:
        key = pygame.key.get_pressed()
        if key[pygame.K_q]:
            running = False
        for event in pygame.event.get():
            if event.type == pygame.QUIT:
                running = False

        screen.fill((0,0,0))

        if not q.empty():
            b = q.get()
            if b > 0 and b < 1:
               playerY = screenHeight - int(screenHeight * b)
        else:
            playerY = playerY + 2

        crashTest = checkCrash({'x': playerX, 'y': playerY, 'index': playerIndex},
                               upperPipes, lowerPipes)

        for pipe in upperPipes:
            pipeMidPos = pipe['x'] + IMAGES['pipe'][0].get_width() / 2

        # move pipes to left
        for uPipe, lPipe in zip(upperPipes, lowerPipes):
            uPipe['x'] += pipeVelX
            lPipe['x'] += pipeVelX

        # add new pipe when first pipe is about to touch left of screen
        if 0 < upperPipes[0]['x'] < 4:
            newPipe = getRandomPipe()
            upperPipes.append(newPipe[0])
            lowerPipes.append(newPipe[1])

        # remove first pipe if its out of the screen
        if upperPipes[0]['x'] < -IMAGES['pipe'][0].get_width():
            upperPipes.pop(0)
            lowerPipes.pop(0)

        screen.blit(IMAGES['background'], (0,0))

        for uPipe, lPipe in zip(upperPipes, lowerPipes):
            screen.blit(IMAGES['pipe'][0], (uPipe['x'], uPipe['y']))
            screen.blit(IMAGES['pipe'][1], (lPipe['x'], lPipe['y']))

        if (loopIter + 1) % 5 == 0:
            playerIndex = next(playerIndexGen)
        loopIter = (loopIter + 1) % 30
        basex = -((-basex + 4) % baseShift)

        screen.blit(IMAGES['base'], (basex, BASEY))
        screen.blit(IMAGES['player'][playerIndex],
                    (playerX, playerY))

        pygame.display.flip()
        clock.tick(60)

min_note, max_note = get_vocal_range()
t = Thread(target=position_on_range, args=(min_note, max_note))
t.daemon = True
t.start()

draw_pygame()
stream.stop_stream()
stream.close()
pygame.display.quit()
You’ll see at the very end of the program, how we use the imported get_vocal_range function to first get our vocal range.
Because we start Pygame in our main program, we’ll see an empty blank window while the console spits our our controller.
In the next post, we’ll address this, and give our user a visual feedback while they’re trying to establish their vocal range.
Once this is done, we then begin our main Flappy Bird loop, tracking the voice locations and updating the bird to match. If the player stops hitting the note, the bird starts to fall.
With this, we have our very first, voice controlled Flappy Bird prototype. It’s not nearly ready to be a production game, but it gives us the basic start for an interactive singing game.
What We’ll Do In the Next Post
In the next post, we’ll further refine our version of Flappy Bird, and turn it into a musical game. We’ll help our player out by giving them reference notes to sing to, and give them some visual feedback when we’re establishing our vocal range.
We’ll make Singy-Bird a more musical game in general, with each of the pipes representing a place that makes musical sense, building a melody.
Finally, we’ll bundle our program into a program we can share with other people, using the py2exe extension.
Where to Go From Here

This post is a work in progress, but I wanted to show how a larger program comes together, outside of a smaller, single Python file application.
You can see all the code in progress now at Github. The program should run on your computer, but be mindful that you’ll need Music21, Aubio, Pygame, PyAudio, and NumPy in order to make everything work.
If you’re interested in more projects like these, please sign up for my newsletter or create an account here on Make Art with Python. You’ll get the first three chapters of my new book free when you do, and you’ll help me continue making projects like these.

Leave a Comment